How to Make June Tailor's Quilt As You Go Casablanca Placemats | a Shabby Fabrics Tutorial
How to Make June Tailor's Quilt As You Go Casablanca Placemats | a Shabby Fabrics Tutorial
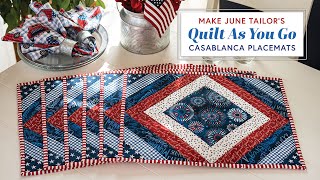 Set an easy table for six with Tammy as she guides you on how to make Quilt As You Go Casablanca Placemats! Using June Tailor’s pre-printed batting, this set of placemats can easily be customized for any occasion and makes a wonderful housewarming gift. Join Tammy in the video below as she shows you how quickly this beginner-friendly project comes together using her favorite tools and providing helpful tips along the way!
Watch the Full Quilt As You Go Tutorials Series: https://www.youtube.com/watch?v=gme9he8k0yc&list=PL-nal4iMTUJuPZocJoHpk0-81_qfsBkOt
#shabbyfabrics #quilting #sewing
_____________________________________________________________
*WHAT YOU NEED FOR THIS PROJECT*
– Quilt As You Go Casablanca Placemats – Land That I Love: https://www.shabbyfabrics.com/p128379/quilt-as-you-go-casablanca-placemats-land-that-i-love-makes-6
– Shop All Available Casablanca Placemats Kits: https://www.shabbyfabrics.com/search?sortOrder=6&q=casablanca+placemats+kit
– Shop All Land That I Love Kits + Fabric: https://www.shabbyfabrics.com/c5666/fabrics/fabrics-by-collection/land-that-i-love
– Shop All Quilt As You Go Kits: https://www.shabbyfabrics.com/c5455/quilt-kits/by-type/quilt-as-you-go-kits
– Quilt As You Go Pre-Printed Batting – Placemats – Casablanca – Makes 6: https://www.shabbyfabrics.com/p66048/quilt-as-you-go-pre-printed-batting-placemats-casablanca-makes-6
_____________________________________________________________
*NOTIONS USED IN THIS VIDEO*
– Creative Grids 2-1/2″ x 24-1/2″ Ruler – CGR224: https://www.shabbyfabrics.com/p72962/creative-grids-2-1-2-x-24-1-2-ruler-cgr224
– Creative Grids 6-1/2″ x 12-1/2″ Ruler – CGR612: https://www.shabbyfabrics.com/p56654/creative-grids-6-1-2-x-12-1-2-ruler-cgr612
– Clover Press Perfect Roll & Press: https://www.shabbyfabrics.com/p57789/clover-press-perfect-roll-and-press
– Frixion Clicker Pen 2 Pack: https://www.shabbyfabrics.com/p29462/frixion-clicker-pen-2-pack-7mm-black
– Heat-Resistant Cool Pins – Bohemian Blue – 1-7/8″ – 50ct by The Gypsy Quilter: https://www.shabbyfabrics.com/p133497/heat-resistant-cool-pins-bohemian-blue-1-7-8-50ct-by-the-gypsy-quilter
– Clover Magnetic Pin Caddy: https://www.shabbyfabrics.com/p51323/clover-magnetic-pin-caddy
– Olfa Rotary Cutters & Blades: https://www.shabbyfabrics.com/c4180/craft-notions/rotary-cutters-blades-and-mats
– Clover Wonder Clips – Assorted Colors – 50ct: https://www.shabbyfabrics.com/p47405/clover-wonder-clips-assorted-colors-50ct
– Karen Kay Buckley Perfect Scissors: https://www.shabbyfabrics.com/p134086/karen-kay-buckley-perfect-scissors-6-inch-blue
– Oliso Smart Iron: https://www.shabbyfabrics.com/c5288/quilting-notions/irons
– Wool Pressing Mat: https://www.shabbyfabrics.com/p67892/wool-pressing-mat-14-x-14
– We’re sewing on a BERNINA 770 QE and we love it!
_____________________________________________________________
*SUBSCRIBE* so you don’t miss our newest videos: http://bit.ly/ShabbyFabricsYouTube
We love hearing from you! Leave a comment below if you have any questions or suggestions for videos! We’ll get back to you as quickly as possible.
JOIN our community of quilte rs on your favorite social media:
*FACEBOOK:* http://www.Facebook.com/ShabbyFabrics
*INSTAGRAM:* https://www.instagram.com/shabbyfabrics/
*PINTEREST:* http://www.Pinterest.com/ShabbyFabrics
I just made a dozen of these placemats and found using the following, in the process, very helpful.
Spraying the center square with adhesive spray kept it in place. Using a walking foot kept all the layers together much easier and there was no shifting. Lastly, after sewing each piece, I finger pressed the seam, then applied a little glue stick on the wrong side of fabric, then finger pressed it down onto the batting. They all came out beautiful. Love the fabric line.
I am planning to use your tips and wing this myself. Wish me luck 😅. Man i wish there was a class near me
Tammy, I have missed seeing you and love your tutorials. They are they best!
Where can I get the Mr. Hand notion?!? We all need a Mr. Hand to pick up things we drop on the craft floor. 😂 Great tutorial Tammy! ❤
You do those corners so fast I had to watch it several times and I still don’t think I have it but beautiful projects.
Before you cut off the excess binding sew the two excess pieces together into one long strip.
Tammy thank you for this excellent tutorial! I learned a few new things. For instance I never noticed the notches on my 97D foot! And, I loved your process for connecting the tails of the binding, especially for a stripe!! I do enjoy hand sewing the binding sitting on my couch. But for small projects, on my porch.
Thank you for the tip on the pressure foot. I have a brother and I looked on the foot and it had the marks. I had no idea! Such a time saver for me! I love June Taylor projects I have made several.
Great tutorial ty for sharing this
This is the second video I have seen with you teaching. You are a very calming and excellent teacher.
Thank you. Great to see you again!
These mats are lovely. Binding is the hardest for me. Seems I’m always off from front and back. =^^=
Love the collection by Michael Miller, " Land that I Love".
Sure wish I could clean up my space in a snap! Lol
WHERE CAN I GET A KIT FoR THE PLACEMATS?
Would there be enough of the striped fabric to do a bias binding so the stripe is more of a candy cane style rather than straight up and down? I know a biased binding is not necessary with no curves, but for a stripe material, I really like the look of it.
When doing binding by hand or any hand sewing projects, my go-to place to do so will be on the couch watching TV or my partner playing videogames.
Tammy, I am so impressed with your method of teaching , and you are such a lovely person. Thank you so much.
Thank you so much. ❤❤
I just love your videos Tammy . I have missed you.
Tammy, so nice to see you again! You are SO good at these tutorials. Excellent tip on joining the binding. This fabric line is gorgeous. For those unfamiliar with June Tailor products, these are like paint by numbers for quilters. Easy to use, as Tammy so nicely demonstrated.
But how do you finish the backside?
I wish you would have shown more than once how to do the corners, there are beginners out here, thank you
So clear on binding join! Thank you.
I’ve misses seeing your tutorials! I’m glad you’re back. You explain everything so well. I hope we will see more of you!